Week 2 of the 1950s Dress Sew-Along
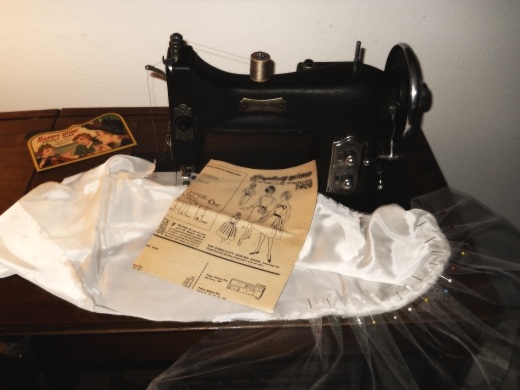 Hello Ladies! I am excited for us to start sewing our 1950s “walkaway” dresses! Does everyone have their patterns fitting properly according to the instructions I gave last week? If you have any questions about the fit, I am more than happy to answer them, so please don’t hesitate to leave a comment if you need any help before sewing your dress. Butterick 4790 is a bit harder to fit than some patterns simply because it does not have an actual side seam, so if you choose to fit your tissue patterns in the future it will probably be easier for you the next time around.
 So let’s start sewing! This week we will sew the darts, skirt seams, and shoulder seams. (You will definitely want to follow your pattern instructions for this dress, as these notes are added as a supplement to the pattern, not necessarily as a substitute.)
Sewing the Darts
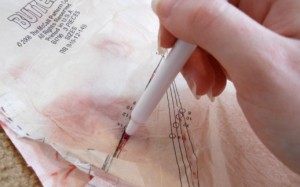
Butterick 4790 has a total of eight darts between the front and back pieces. There are two vertical darts in the back which are very simple, and four vertical darts in the front sheath piece in addition to the two regular horizontal bust darts. While darts are not hard to sew, I used to find myself dreading the tiresome process of tediously marking the darts onto the fabric one pin prick at a time! So after years of using traditional methods for transferring dart markings, I finally decided just to slash right through the darts and draw on the lines with a fabric marker!
How to Sew the Darts
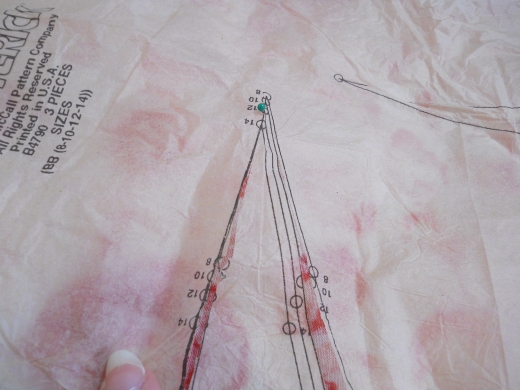 1. Cut through the dart markings for your size, stopping right before the point.
2.On the wrong side of your fabric, mark where the dart lines are with your fabric pen. (Test on a swatch of your material first to be sure the marker will erase.)

3. Pin the dart closed, making sure the lines match up exactly.
(For the vertical darts, it doesn’t matter which end you start at, but for the horizontal bust darts you will want to start sewing at the side, finishing at the point.)
4. Using a regular length machine stitch, sew until you get about 1/2″ away from the stopping point. Now shorten your stitch lenth and sew the remaining length of the dart till you reach the fold of the fabric.


6. There’s no need to backstitch since the tiny stitching will not unravel. Clip the threads and press your dart, then proceed to the next one. (I learned this method for sewing darts from the Palmer/Pletsch School of Sewing, so I can’t take any credit for it. ) : )
The next steps are all going to be so easy!
Sewing the Circle Skirt
1. Take the two half-circle pieces and pin them together at the side seam with the right sides together. (Now it will just look like one half-circle, with one long side pinned and one left free.)
2. Sew this seam and press it well using the Five-Step pressing method I give instructions for here. You may, of course, choose to leave your seam allowances unfinished, but it will only take an extra minute to serge or zigzag the raw edges and will greatly improve the appearance on the inside!
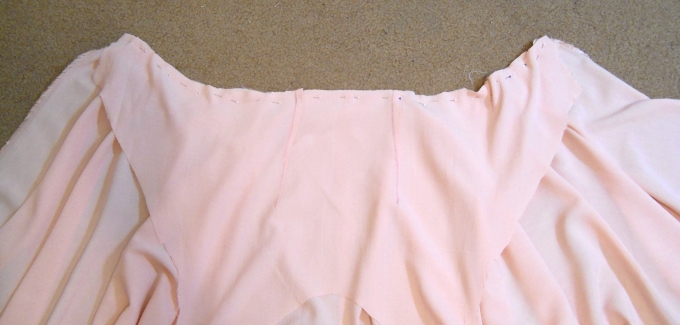 3. Pin the top of the circle skirt to the bottom of the bodice back piece with the right sides together.
4. Stitch this seam, press it well, and finish the raw edges.
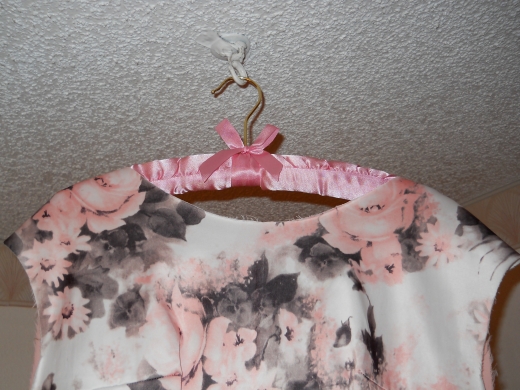 Now that your skirt is on, you will want the dress to be hanging on a hanger (the padded type is best) at all times when you are not sewing it. The reason for this is that the bias needs to set on the skirt, and in a few days from now you will notice that the hem is no longer circular! Most professional seamstresses let their skirts hang for at least three days before they hem them to be sure that the bottom edge won’t turn out all warped.
And finally, sew your shoulder seams.
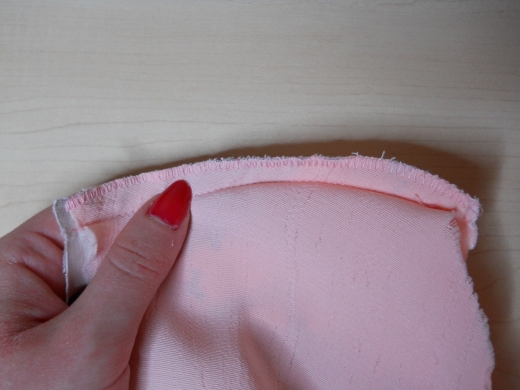 This step is a piece of cake, of course! Pin the front and back pieces together at the shoulder seams, and stitch them closed starting at the neckline edge and going out to the shoulder edges. Press the seams and finish the raw edges.
That’s it for this week! I was able to do the above steps in one hour, so I may finally be able to make that “Three Hour Dress” goal after all! Back in the 50s women were supposedly able to “start the dress at 9:00 am and wear it out at noon”, but if they were good seamstresses they would have let their skirts hang for a few days first.
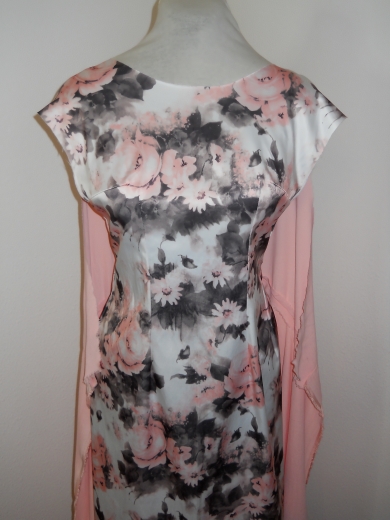
Next week we should have no problem finishing the dress binding and hemming, and the following week we’ll post our pictures just in time for National Sewing Month!
As always I am happy to answer questions, so let me know if anything is unclear to you. Keep up the good work – I can’t wait to see what everyone comes up with!
Happy sewing,
Katrina

[…] Week 2 of the Sew-Along (Sewing the Darts, Skirt, and Shoulder Seams) border=”0″ /> […]
Aaargh! I didn’t buy enough fabric! For some reason I messed up the numbers. Now I got to wait for a Joanns-coupon…and I really want to continue sewing!
Not enough fabric – that doesn’t sound like a lot of fun! Have you already cut out all of your pieces? Because all three earlier versions of this pattern called for less material by simply piecing the skirt back. When you viewed the skirt from the back, there was a horizontal line about 6 inches from the bottom or so. That way the sewer could place most of the skirt on a folded peice of 44″ wide fabric so the top of the skirt was close to the fold. Whatever part of the skirt pattern piece extended past the selvage was cut as a separate piece and sewn to the larger skirt piece. From 1952 – 1999 that was the way that all of Butterick’s walkaway patterns worked!
Hope this helps,
Katrina
[…] 4790 50s dresses! If you have not finished all the previous steps mentioned in Week 1 and Week 2, don’t worry – you can post the link to your finished dress pictures whenever you […]
Thank you so much for your advice! Unfortunately, I had cut out all the other pieces already when I thought “Wait a minute…there is not enough!” So the second part of the skirt is missing but I will get more fabric this weekend and then I will be able to catch up. Thanks again, I am impressed that you know about all those details about the patterns. Pretty cool :)!
Because I’ve expanded the width of the bodice back piece, it doesn’t match up with the top of the skirt. How do you ease in the excess? DId I make the back darts too narrow? Also, do you stay-stitch the top of the skirt as the instructions state? It seemed like a reasonable thing to do, so I did it. I’m learning a lot with this project. I’d never heard of the 5 step press.
Hello Jeri,
Do both the bodice and the skirt come to the center front? Because if the bodice comes to the center front (plus enough for overlap), and if you cut the skirt according to your waist measurement, they should match up perfectly. But even if they don’t, it’s an easy fix! If the skirt is too small, simply cut the top of the skirt a little bit shorter to give you a larger circular waist at the skirt top. If the bodice is too big, you can trim off a little bit on either side of the center front, but do keep in mind that you need to leave enough for the bias binding seam and a small overlap.
Yes, the skirt should be stay-stitched, and as I mentioned it is best to follow along with the pattern instructions using the sew-along as a supplement, since I don’t have room to note every step of construction. So it sounds like you’re doing well! The five-step pressing method is taught at the Palmer/Pletsch School of Sewing (run by McCalls pattern designer Pati Palmer), and is so helpful it getting your seams to look perfect!
Keep up the good work!
Katrina
I’m hoping I got the bodice big enough–I have a wide rib cage to get around and it’s really hard to be sure I had the pattern at the right level when I was fitting it. Shortening the skirt will work fine as I’m so short that I’ve got plenty of length to spare. I’m trying to do this slowly and carefully to get it right. If I succeed, I think it’s going to be a beautiful dress.
Hello Jeri!
Speaking from personal experience, being on the shorter side of things does come in handy sometimes! : ) Even if for some reason the bodice was made a little bit too small, you could still slit the bodice back piece at where the side seams would be and sew in a narrow strip of fabric to widen it. When I first started fitting patterns it was a little strange at first, but after a couple fitting projects I got used to it. So good job on fitting this dress – while it is easy to sew, it is not easy to fit because it doesn’t have regular side seams. And I’m sure the dress will be gorgeous!
Happy sewing!
Katrina
It’s going to work! If anything it might be a bit big. Now on to leaning about bias trim!
I managed to get quite far in only two afternoons. (With a little help)
http://stitchintimeandspace.blogspot.com/2011/10/1950s-dress-update-2.html
I think once finished I could sew the same dress again by myself.
Have to say love the circle skirt…would it be possible to take the skirt part of pattern separately and turn into skirt?
Hello LadyD,
Great work! It sounds like you’ve finished the hard part already, and those materials are just perfect for a 1950s dress!
You could definitely turn the circle skirt pattern piece into a regular skirt. All you would need to do is make a waistband to sew the top of the circle skirt into. Just take your waist measurement, add 1.25 inches for seam allowances, plus another inch or so for ease. Then cut a rectangle that is this measurement by about 4 inches and interface this waistband piece. Fold the waistband with the right sides together, and stitch with a 5/8″ seam allowance (.625 inches) on both short ends. Trim the seam allowances, and turn the waistband right side out. Now pin one unsewn edge of the waistband to the top of the circle skirt, leaving the other unsewn edge free. (You may need to ease the skirt into the waistband.) Stitch this seam with a 5/8″ seam and press it well. Now take the remaining unsewn long edge of the waistband and press under 5/8″ towards the inside. Pin this folded edge to the inside of the skirt, and stitch closed. That’s it!
Let me know if you have any questions.
Happy sewing!
Katrina
Thanks for the info. 🙂
Only other question is shoulder seams. Do I press then open or to one side? (I Pressed the skirt seam open (hope that was right).
Hello LadyD,
Shoulder seams (and side seams for that matter), always get pressed to the back. You should always press them open first, but then press the entire seam allowance to the back.
Hope this helps!
Katrina
On sewing the circle skirt can you go more into detail on how to sew the skirt together, I am having trouble figuring out how to put it together. I don’t understand what to do with the U in the middle of the skirt.
Hello there! Glad to know people are still using this sew-along. : ) Are you following the pattern instructions in addition to these instructions here? The “u” in the middle is going to be the waist, so what you need to do is pin the “u” (top of the skirt) to the bottom of the bodice. Does that help at all?
Do let me know if you have any more questions!
Happy sewing,
Katrina
I don’t think my mind is wanting to wrap itself around the instructions. Do I connect the bottom of the U with the bottom of the bodice?
Hi there! Yes, you’re absolutely right! The “u” curve of the skirt will be pinned and sewn into the straight lower edge of the bodice. It seems funny to sew something curved into something straight, but that is what makes the skirt so flaring and circular.
Hope this helps!
Katrina