Hello Ladies!
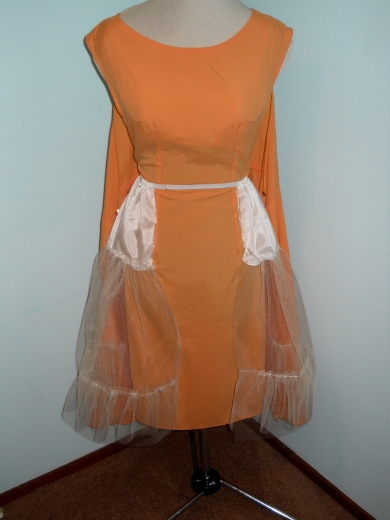
This is the first entry in our Walkaway Dress Sew-Along! Since we probably need a little more time to purchase our patterns and fabric, I will begin by demonstrating how to sew a 1950s crinoline! While the crinoline underskirts of the 50s were actually just like tiered skirts made of ruffled tulle and net, I’ve found that you can achieve the same silhouette with only two yards of stiff crinoline or netting and 1/4 yard of lining fabric. My other reason for not making a completely authentic 1950s petticoat is that the walkaway dress has that front sheath panel which does not allow for skirt fullness in front. So I discovered how to make a crinoline that only pouffs out in the sides and back, leaving the front piece undisturbed. It is so simple to make, and I’ve given a tutorial on how to sew this below.
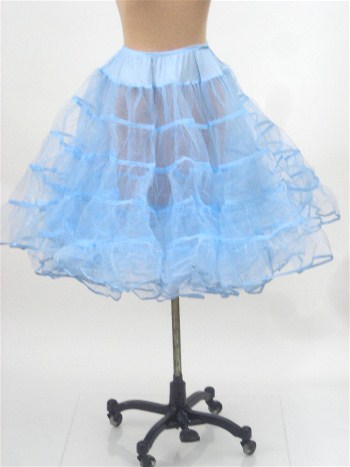
History of the 1950s Crinoline Underskirt
After the fabric rationing of World War II, women’s “New Look” fashions required full crinolines or petticoats to hold out their enormous, circular skirts. While I’ve never seen one of these original 50s crinoline slips in person, I’ve talked with several ladies who actually wore them while in high school in the 1950s. They all seemed to say the same thing:
- “We would wear lots of petticoats, not just one, and when our petticoats got too soft, we would just buy another one and wear it on top of the old ones! The rich girls would wear as many as nine petticoats at a time… ” “I remember when we were driving away on our honeymoon, the whole back rack of our car was filled with all my crinolines hanging up!’
- “The 50s crinolines were not actually made of stiff crinoline, they were more like a tulle or netting.”
- “These crinoline petticoats looked just like a tiered, ruffled skirt. Each ruffled tier was bigger than the one above it.
“I remember how to starch a crinoline to make it stand out more – I would soak the petticoat in water that was mixed with Knox gelatin, then I would lay it out flat in a big circle on the basement floor. In the morning when I went to put it on, the skirt would just stand straight out to the sides! Of course by the end of the day it would start to wilt, but for hours it would just puff right out!” (The petticoat shown above can be purchased at Blue Velvet Vintage.)
So now let’s get to sewing! I recommend sewing your crinoline before you start your dress, so you will have the appropriate foundation garments to give you that classy 50s silhouette. If you try on your dress without the crinoline, it may be just a tiny bit discouraging to look in the mirror and think, “This doesn’t look quite how I had hoped.”
Wearing a 1950s crinoline skirt is just grand, and once you’ve sewn one you’ll be so glad you did! It will only cost you about $4 and take just a couple of minutes, so at least by the time you finish your walkaway dress you really should make one!
How to Sew a 1950s Crinoline Petticoat
You will need:
-
1/4 yard of 45″ wide lightweight lining (polyester, rayon, acetate, or China silk)
-
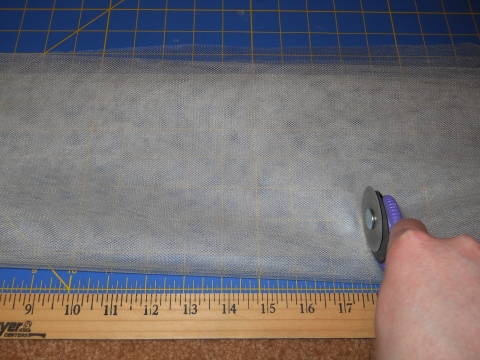
2 yards of 54″ wide crinoline (stiff netting will not work as well, but is a substitute)
-
3/4 yd. – 1 1/4 yds. of elastic (enough to go around your waist)
-
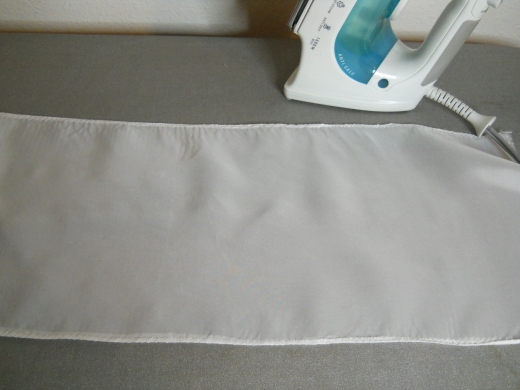
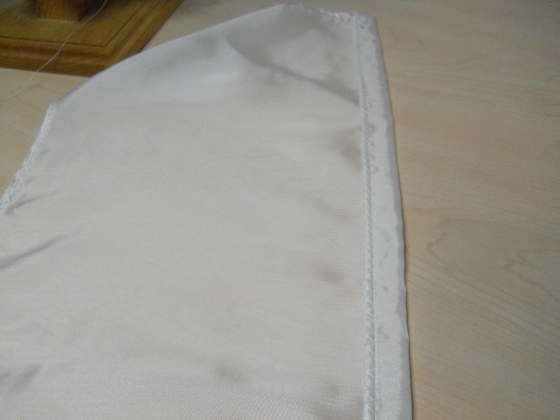
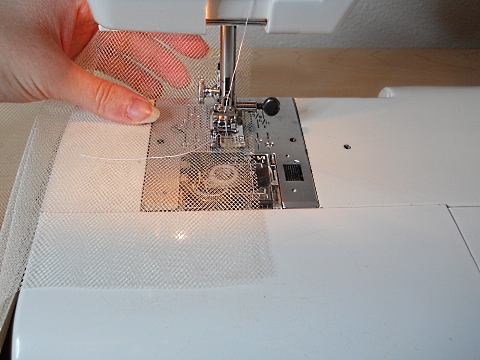
Take your 1/4 yard of lining and finish one long end of it (45″ wide) with a serger or zigzag stitch. Repeat on the other long end.
-
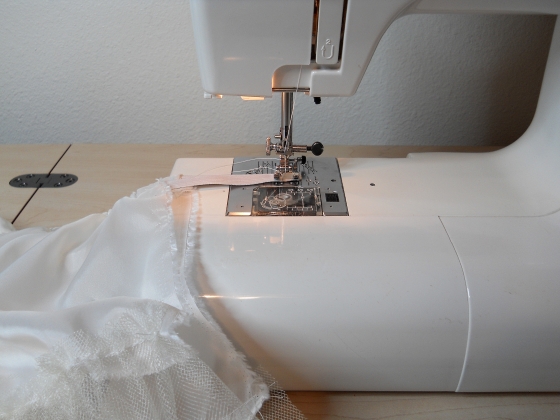
Fold down one finished edge of the lining approx 1/4″ more than the width of your elastic and press.
-
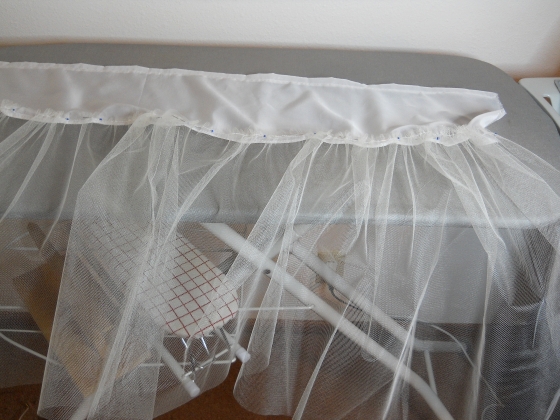
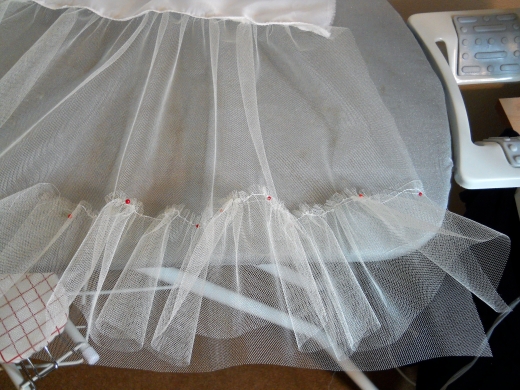
You’re almost done! Now simply run your elastic through the casing you made in the top of the lining, and stitch the two ends of the elastic together. Note that you do not want to catch the lining in this seam!
You want to be able to adjust the fullness of the petticoat by sliding it off to the sides. This way you can pull the crinoline all the way around your waist for a full circle skirt, or slide it towards the sides to wear with your walkaway dress!
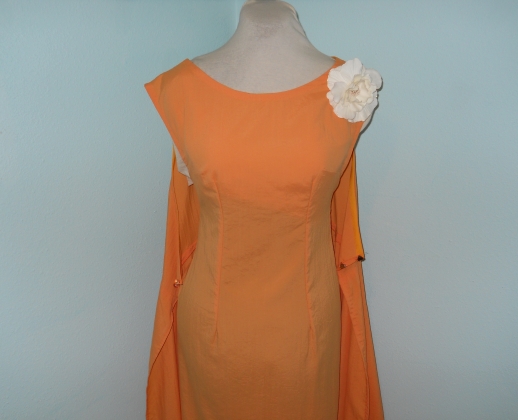
Once you’ve put on your walkaway dress, fasten the front piece at the back waist as indicated by the pattern, then pull the crinoline up over the front sheath part. Fluff out the crinoline skirt for fullness, then snap the wraparound piece closed and arrange the circle skirt over the crinoline. You can slide the lining off toward the sides, so that the only part of the dress that has crinoline underneath is the full circular part. (And of course if you ever choose to wear this for a 50s dress that does not have an opening down the front, just distribute the gathers evenly around the elastic and your whole skirt will pouff out!)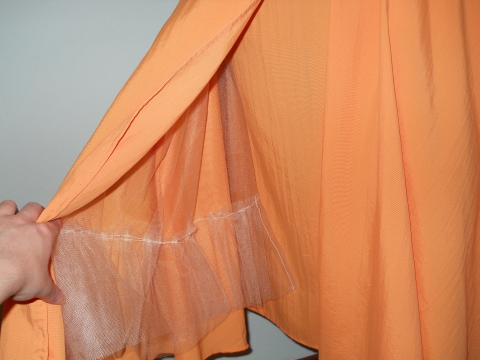
That’s all there is to it! Hope you enjoy sewing it, and feel free to post any questions you might have. 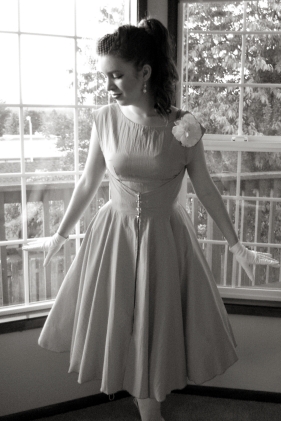
On August 16th we will start cutting out our pattern to fit it, (Butterick 4790), and each following week we will make more progress on the walkaway dress. I believe we can sew the whole thing in one month’s time, and at the end of that we’ll have a 1950s dress “party” where we will all post pictures of the finished dresses!



[…] out with a post on how to make a 1950s crinoline that is designed specifically for the walkaway dress. You will be able to make it with just 1/4 […]
Okay, I just want to be certain about this… are you using tulle/netting in the tutorial or actual crinoline? I’m about to order some crinoline from Vogue Fabrics because I was concerned that tulle wouldn’t give me the pouf I wanted.
Hello Cyndi, Yes I am using a very stiff crinoline in the pictures like the directions call for, though netting may work too. You are completely right about tulle not giving enough support! That is why the girls back in the 50s had to wear layers and layers of tulle petticoats to achieve that pouffy silhouette. Quite honestly I’m not sure why they didn’t just use crinoline, since it really isn’t scratchy if you wear a slip underneath. Anyhow, hope this helps!
I have my grandmother’s ruffled petticoat that she wore in the 50’s. It’s in cotton and heavily starched. You need to iron it every time you use it, but it works wonders for holding out your skirts!
Hello Isis, How wonderful! I would just love to see pictures! Perhaps you can add pictures of your grandmother’s petticoat to your blog post once we’ve all finished our dresses in a month or so? Is it cotton organdy?
Thanks for this tutorial. When I made my dress I wanted to wear my petticoat, but realized it would show. I’m putting this on my sewing to-do list.
I actually have a lovely vintage petticoat with the top lining layer fraying on one side quite a bit, but the netting is in good shape all around. Originally I was going to make a completely new top layer, but now I think I will try to use it to make this walk-away crinoline.
Oh wow, Stephanie, that sounds gorgeous! You’ll have to post pictures!
Thanks so much for taking the time to do the sewalong. It is really much appreciated and I am looking forward to it. Here is my question:
What width elastic do you recommend?
Hello Ronniie, It is really up to you as far as what width of elastic to use, but at least 1/2″ wide is probably best. If your elastic is narrower than 1/2″, the crinoline may pull it down a bit and it may not be sturdy enough to stay in place. That being said, I wouldn’t choose an elastic wider than 1″ wide to avoid the risk of the elastic showing. Hope this helps!
Happy sewing!
Katrina
Thanks for sharing!
This looks great. I like that you left the front without the netting, awesome idea.
Yes, I think it must be cotton organdy, but I’m not sure.
Thanks Katrina, that is a great help
Hello Katrina, I have just recieved two walk away dress patterns to make this one for me and one for my daughter. My question is before I get the material for the crinoline, what size would the measurements of the above material fit. My daughter is a uk size 20 and I am a uk size 8. so i dont think it would fit the both of us. I am still a fairly new beginer, so sorry if this seems a very obvious question. would i just double the amount.
Hello Sew Vala, Actually the crinoline is really just a “one size fits all” sort of skirt! On smaller ladies the lining will be more gathered, and on average sized ones it will fit more smoothly through the waist and not need to be moved to the side as much since it will automatically fit just around the back and side of the waist. So yes, I would just purchase twice the amount of material that is listed for one crinoline skirt, and you should be good to go!
Happy sewing!
Katrina
I’ve been most curious as to how this crin would look and it is ingenious! Thank you for the very comprehensive tutorial. I am wondering, if you were making this as a party dress, perhaps a layer of tulle cut from the same pattern pieces as the skirt and sewn inside the outer fabric at the waistband before attaching to bodice would also work… in fact, I’m going to give it a go and will let you know, how it goes!
I’m in the process of hemming a dress where I’ve attached rows of tulle to the bottom lining between that and the outer fabric which acts like a permanent poofer (not that it actually needed any help to begin with!).
Hello Molly,
That’s a good idea! Underlining the skirt with tulle will help to some extent, though it is so light that you would still need a crinoline underskirt to get the maximum amount of “pouff”! And I would love to see pictures of your dress that has the tulle in between the two layers – it reminds me of how they used to underline the bottom 6-12″ of Victorian skirts with crinoline.
Thanks for commenting!
Katrina
Is any special kind of thread needed to be used with crinoline. *squints at pictures* What kind of stitch do you use for sewing the crinoline together? Straight or zigzag?
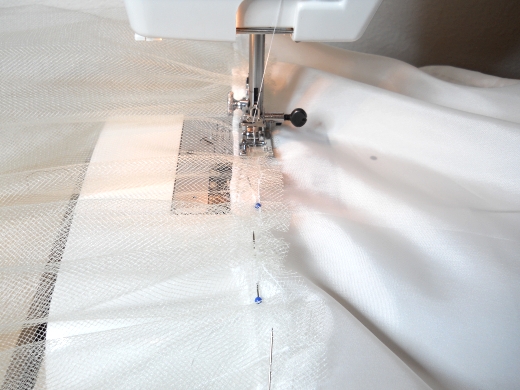
Hello there! I just use a regular all-purpose thread for sewing on crinoline, and a straight machine stitch for sewing. Of course you could zigzag over buttonhole cord for an easier way of gathering up the crinoline, but I prefer to keep it simple.
Happy sewing!
Katrina
Thanks. 🙂
Coz I’ve tried sewing a tulle underskirt before (I’m guessing netting is going to be just as difficult)all by hand and the pins just fell out all the time making it a nightmare to sew. I ended up will a scrunched ball of fabric and thread and had to throw the whole lot away.
‘fraid I’m a bit of a sewing disaster when it comes to clothes.
I’m having trouble finding anything called ‘crinoline’ (can only find ‘netting’) would it have an alternative name in the UK?
Hello LadyD,
Netting will work for the crinoline petticoat, as long as it is very stiff. If you think it might not be firm enough, you could always purchase some extra fabric to make the bottom ruffle wider. (This would help it “pouff” out more).
Let me know if this answers your question!
Katrina
Hi Katrina, Thanks. Yes this answers my question.
The netting is only £1 a metre so I can buy a little extra to make more ruffles if needed.
Hello LadyD,
No problem! And did you see my answer on the fitting questions?
Happy sewing,
Katrina
Yes. I did thanks for the advice. I’m going to try again Saturday…this time with help from mum with pinning and measuring. Also going to make a toile just to be doubly sure. What’s your opinion on lining? I thought I would use my toile to line the ‘bodice’ and front of dress but not line the circle skirt bit.
Hello LadyD!
You could certainly line the bodice if you like, though I think it might be more comfortable with just one layer. Any extra fabric might make it fit too bulky in the collarbone area, but there’s nothing wrong with just pinning the two layers together and trying it on! Do let me know if you have any more questions.
Happy sewing,
Katrina
I looked at a skirt I already own (got it from Carnaby Street – london) and it looks like the petticoat attached to that is similarly put together.
http://stitchintimeandspace.blogspot.com/2011/10/1950s-crinoline-petticoat.html
What a cute skirt! I almost wonder if you could layer that under your 50s crinoline for added “pouff” to the silhouette?
Happy sewing,
Katrina
I finished (sort of) making the crinoline.
http://stitchintimeandspace.blogspot.com/2011/11/1950s-dress-update-3-crinoline.html
Conibilized an existing skirt.
Thanks for the tutorial. I am making one of the McCall’s Retro dresses right now (B5603) and I’d love to make a crinoline slip for it for special occasions (like 25¢ martinis at Commander’s Palace). This is exactly what I need!!!
I just made one today. Thank you for this! I did find that I need to shorten it significantly, as I’m only 5’1”.
I am 70 & I wore the big skirts & we made our petticoats from plastic screen like you put on windows. They were made just like the net ones but we only had to wear 2 so our dresses would stand way ou,t but we always wore more. The more petticoats you had on the more you was in style.
We also wore hoops but we had to be real careful sitting down or the hoops would go over our heads!
Hello Nettie,
Thanks for sharing! I always love to hear from ladies who actually lived through the 1950s and remember wearing those styles! I can imagine you would have to be careful sitting down in hoops! Way back in the Victorian era, Laura Ingalls had to jump into a moving carriage pulled by runaway horses in order to take her Sunday drive with Almanzo. It’s amazing the things we’ll do to look fashionable!
I’m so glad you found the post, and I’d love to hear more of your thoughts on 50s fashion in the future.
Have a good day,
Katrina
I need to make one for lady to go under a poodle skirt I am making for her. The lady waist size is 50-1/2 and her hips are 59-1/2. Would this fit her or would I need extra material. I know you said that it was one size fit all. If I need extra fabric how much extra would I need. Thank you
Hi Joyce!
I think I meant “all” sizes that were included in the walkaway dress pattern, which is what this crinoline was designed for. But I should have been more specific!
I think you would need to kind of start from scratch with the yardage amounts. You will probably need twice as much lining fabric, and cut two pieces the size that you usually would. Then you can sew these two pieces together at the selvages, so you have one piece that is now 90″ wide. Of course she probably would prefer to have less bulk at the waist, so you could trim it down to something more like 70 or 80″.
For the crinoline, I would probably get twice as much as well, since otherwise it will just hang around her legs and won’t make it stand out at all on the bottom.
Hope this helps!
Happy sewing,
Katrina
[…] first thing I did was sew the foundation garment: the […]
I want to thank you for your wonderful posts. I have learnt a lot. I have been wondering how to make a crinoline. The dress makeover is great. I bought this pattern a couple of years ago and read negative reviews, so I never made it. Thanks for the info.
You’re so welcome, Francine! I’m very glad that you found this info helpful!
I found this new petticoat on ebay and thought what a fab idea.
http://www.ebay.co.uk/itm/Vintage-50s-Circle-Fancy-Net-Petticoat-with-Lace-Bow-Free-Sized-Rock-Roll-/161026162364?pt=UK_Women_s_Vintage_Clothing&hash=item257de83ebc
A Wrap-a-round petticoat.
What a neat idea, LadyD!
In the 50’s, I was in college and, in my sorority house, we SHARED petticoats. When somebody had a “special” date, they just went around borrowing from everybody else. And yes, it wasn’t unusual to wear at least half a dozen petticoats at one time, sometimes more. The top section of these stiff petticoats was generally soft nylon, comfortable, and not bulky. I had one that was made of nylon “horsehair” that was super-stiff and supportive. Also, there was a type of permanently stiff taffeta that never lost its crispness (but made an unpleasant crinkling noise when one moved).
Dear Gretta,
Wow! Thank you for such a fascinating comment! I LOVE hearing from women who actually grew up in the 1950s and really wore those dresses. It must have been marvelously fun! Your stories of sharing petticoats is really great! Times seemed so much friendlier back then.
Thank you again!
Happy sewing,
Katrina
[…] anyone. I have under it a crinoline I also made using Edelweiss’s crinoline tutorial here: https://edelweisspatterns.com/blog?p=850 (sorry, I have not yet figured out how to make a regular link!). It was really easy despite my […]
[…] to sew an authentic 1950s walkaway dress! I’m sharing complimentary instructions here for a crinoline petticoat/underskirt I created specifically for this dress as it is quite unique. […]