
Perfectly pressed seams will make all the difference in making your garments look professionally made.
When I was learning to sew, my Parisian-trained sewing instructor insisted I learn the “Five Step Pressing Method” for how to make a seam lay flat. The concept is that steaming and pressing the seams while the garment is being made is the only real opportunity you have to meld the stitches to the fabric – because once it’s sewn, all you can really do is iron out the wrinkles in the fabric itself. Often times as seamstresses we like to hurry through the pressing process because we want the garment to be done with. But if you want your seams to look wonderful every time, follow this Five Step Pressing Method to ensure your garment will look its best for years to come.
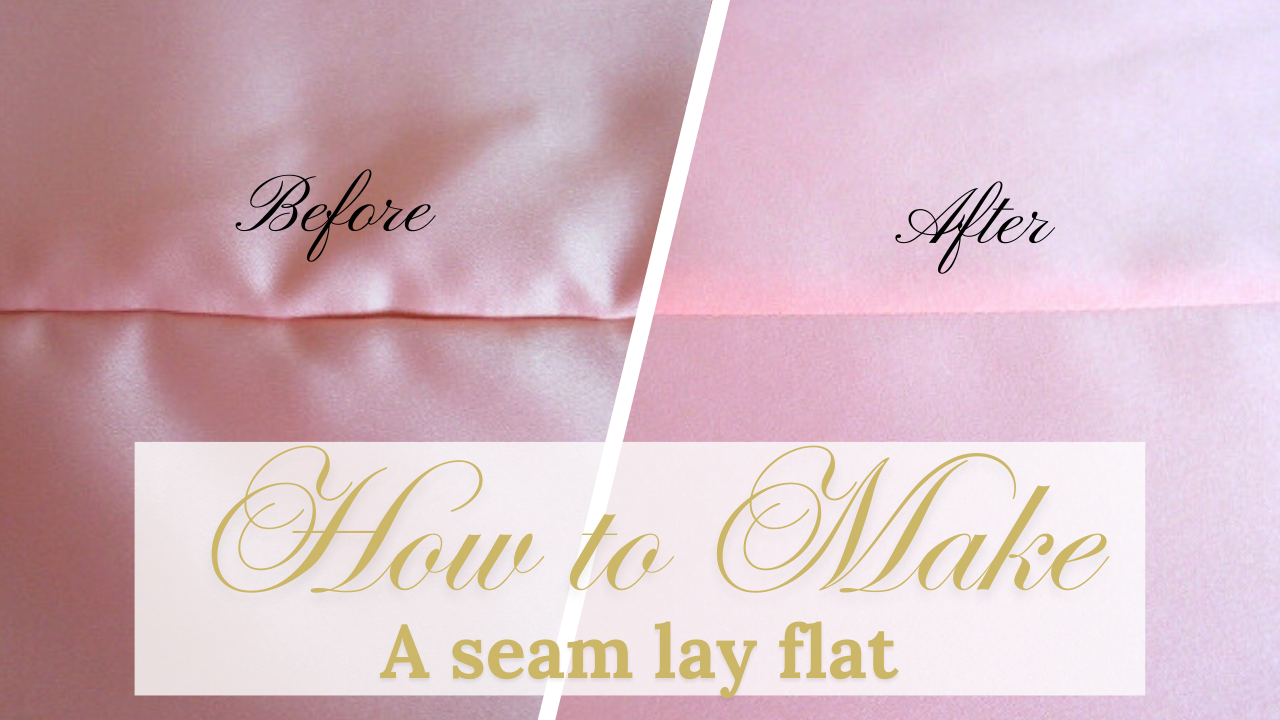
Below is a photo of how terrible a seam can looked before you’ve pressed it. Pretty bad, no?

Be sure you start with the right equipment to set yourself up for success:
1. A clean iron. (The soleplate should be free from residue.)
2. A press cloth made of 100% cotton or silk. (For synthetic or delicate fabrics, you should have a press cloth in between the garment and the iron’s soleplate. It’s a good idea for cotton fabrics as well. I’m omitting the press cloth in these pictures so it’s easier for you to see.)
3. A well-padded ironing board.
The Five Step Pressing Method for How to Make Your Seams Lay Flat

1. The first step is to “meld the stitches”. You cannot underestimate the importance of steaming your seams for the first time after you’ve sewed them. This will “meld” your stitches to the fabric and make them closer to one piece of material, than just two pieces of fabric with thread running through. This is accomplished by laying the seam flat, just as when you sewed it, then pressing the seam for at least fifteen seconds while steaming the fabric. Use the highest setting that your iron recommends for your material’s fiber content (i.e. Cotton, Linen, Silk, Polyester, etc.).

-
- 2. Next, open up your seams and press down the center of the opened seam from the wrong side of the fabric. Use lots of good steam in that seam.

-
- 3. Now turn the garment over so that the right side of the material is up, and press down the center of the seam from the right side, keeping your seams open just as you did in step two. This will make the seam appear flatter from the right side of the garment, which is so important since your garment will only be viewed from the right side when it’s being worn.

- 4. For this step, you simply flip the garment back to the wrong side and press both seam allowances of the opened seam to one side. This may take a bit of patience and firm pressing, since the seams will naturally want to stay open after steps two and three. Push the iron away from you with slight pressure, while holding the fabric taut with your free hand.

- 5. Finally, just turn the fabric so you are viewing it from the right side again, and press over the seam, while keeping the seam allowances pressed to the same side that they were in step four.

That’s it! Doesn’t it look so much better than it did at first?
Bonus tip:
- Shoulder seams always get pressed toward the bodice back,
- Side seams always get pressed toward the back for skirts and bodices
- Seams in the middle of a garment (such as a princess seam, or a skirt gore seam), usually get pressed toward the side seams.
Happy sewing!
Katrina

Some of the links on this website are affiliate links.


You are right, a lot of us often hurry through seam pressing but it really makes a difference. Thanks for this! 🙂
[…] Sew this seam and press it well using the Five-Step pressing method I give instructions for here. You may, of course, choose to leave your seam allowances unfinished, but it will only take an […]
[…] Thank God for Gingher pinking shears! And speaking of seams, I am so glad I learned how to press seams properly many years ago! You would not believe what a huge difference it makes in “before” and “after” pictures. And since this skirt has nine gores (and therefore lots of prominent seams!) it is crucial that the seams lay flat, are well pressed, and are as unnoticeable as possible. You can see below how the seams looked before and after pressing, and if you have never learned the “five-step pressing method”, I would highly recommend that you read the tutorial I wrote here. […]
[…] front and bodice back together at the side seams, pressing well and finishing the raw edges. (Here is a complimentary tutorial to make your seams look pristine and perfect using the Five Step […]
[…] Five-Step Pressing Method Tutorial […]