The last few days I have been trying desperately not to be in the “depths of despair” (as Anne Shirley always said) about the fact that I haven’t posted pictures sooner! Because the sewing progress I have made on the Anne of Avonlea gown project has been rather detailed and time consuming work, the bodice hasn’t hurried along as quickly as I was hoping for. It’s not that I haven’t been working hard on the dress, it’s just that the last several steps have focused on details that don’t vastly change the overall appearance of the bodice from how it looked last week.
Nevertheless, I have thoroughly enjoyed the hand sewing I’ve been doing, and am very pleased with the way it’s coming together!
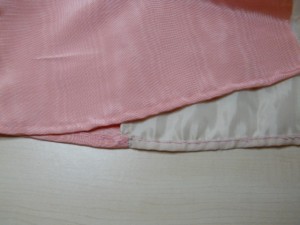
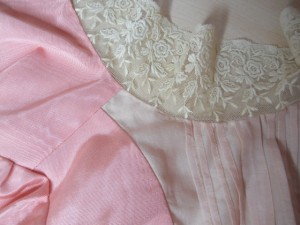
Below is a picture of how the inside seams of the bodice looked after I finished them. Most were sewn by machine, but I finished the armsceye seam allowances by hand while watching “Anne of Green Gables”.
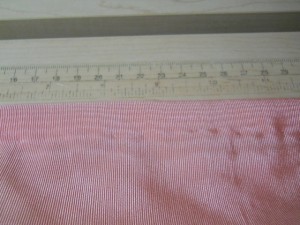
Next I finished the bottom edge of the bodice using the “prickstitching” method – this technique uses wider stitches on the inside and tiny, almost invisble stitching on the outside.
I used this same method for finishing the back opening edges which will soon be finished with a hook and eye closure.
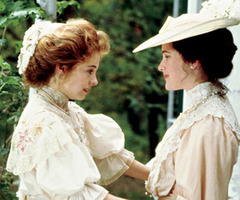
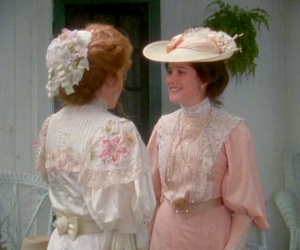
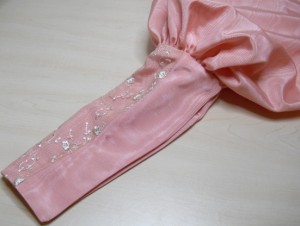
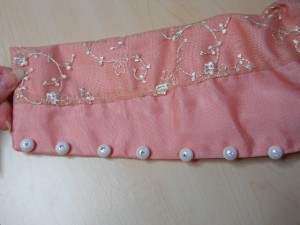
With all raw edges hemmed or finished, I now turned my attention to the leg-o-mutton sleeve cuffs. If you look closely at the film stills, you will see that the cuffs on Diana Barry’s going away dress are partially covered in a lovely embroidered netting lace.
There is a strip of this lace that goes down the side of the cuff, and I was determined to achieve the same look. While that original lace would have been an English embroidered lace made from cotton netting, the only type I had available was a very similar pattern, but on a nylon net instead. The netting lace was sewn on by machine using an invisible thread.
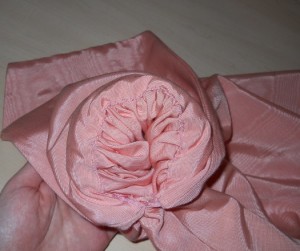
I had thought that the lower part would be so easy to sew, and it was easy until I tried to join the upper sleeve to the lower sleeve! I had to gather almost forty inches of heavy bengaline into a tiny eight inch-wide cuff, which was a challenging task that the machine wasn’t up for.
So I handstitched the upper sleeves into the cuffs, then finished the raw edges by tucking the seam allowances into the cuff and whipstitching it closed by hand.
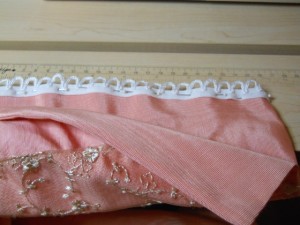
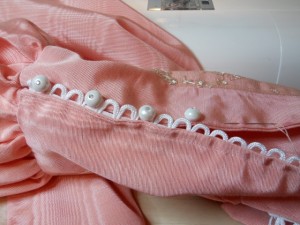
With the cuffs successfully attached I added button looping (one of my favorite sewing accessories!) to the cuff edges. The looping was also attached by machine with invisible thread.
When it came to sewing on the buttons, I did splurge a little bit and chose some pearl-like buttons with Swarovski crystals in the center of each one. I know this type would not have typically been used on gowns back then, but I couldn’t resist making the cuffs a little more whimsical and fanciful!
Lastly, I attached the lace collar to the neckline by machine, then prickstitched the seam allowances down towards the bodice to keep the seam allowances from being visible through the netting lace.
So all that’s left on the bodice is the lace flounce/trim which I will attach by hand, the shell buttons down the front, and the hook and eye closure down the back. After that I will whip up the skirt, draft the belt, and get ready to have some pictures taken!
And in anticipation of the upcoming photo shoot I invested in a pair of Victorian high-laced boots which will no doubt add to the authenticity of the look.
More pictures to come soon!
Katrina




This is going to be soooo pretty!
Great job on the progress. Those sleeves are perfect…perfect. I totally understand about hand sewing all that gathered lovely-ness in. It would be rather tricky on the machine. 🙂 The lace on the sleeves and the buttons are very Victorian inspired.
Thanks so much for sharing your progress. I enjoyed reading it very much.
Those boots are very lovely as well. I have a black leather pair like that. 🙂
Will you making the hat too?
Thank you, Brielle! I appreciate the encouragement! I am really hoping to recreate the hat and possibly Diana’s handbag/traveling bag for the complete look… So hopefully the answer to your question is “Yes”!
*gasp* Those boots! You will certainly have a dress worthy of them. That cuff gathering is amazing.
Thank you, Jeri!
I can not wait to see it finished! IT will be so pretty.
Your attention to detail is absolutely amazing Katrina. I am so enjoying seeing the techniques you are using to make this wonderful gown. Incredible work joining the sleeves to the cuffs. The shoes and buttons are just gorgeous as well.
Thank you, Michelle! I was very relieved to get the sleeves finished!
Your skills are wonderful. I am so looking forward to seeing this dress. One day I would love to able to create something as beautiful.
I would say that you have the more time-consuming parts of the this dress done. It is coming along wonderfully. Those boots look like a lot of fun. Do you have visions of yourself parading around in this dress yet? Are photo shoot ideas running though your mind constantly?
Hello Annabelle,
Oh yes! I am constantly thinking of how my photo shoots should be, and I am hoping to have some of the pictures taken at a private location which looks very similar to the Green Gables property. The interior shots will most likely be taken at an historic hotel or in an Edwardian mansion… It’s so fun to think about! Thanks for the comment!
Absolutely gorgeous!!